The Battle of Stirling Bridge
The 11th September 1297 was a major turning point in Scottish history due to the Battle of Stirling Bridge. Ever since 1286 with the death of Alexander III, Scotland had been left without strong leadership. Initially, Alexander’s granddaughter and only heir Margaret was to return from Norway to take up the throne. But sadly she died on the journey over to Scotland.
Numerous Scottish nobles claimed their right to the throne but without collective agreement no one could be chosen. Edward I of England was invited to arbitrate over the proposed contenders. Seizing his opportunity, he declared himself overlord of Scotland. At the same time he chose John Balliol to become king but only because he would be “his puppet.”
Balliol only remained King for a few years before Edward returned to Scotland in 1296 and forced him to abdicate. Edward took control of all of the major strongholds in Scotland and placed his trusted nobles in charge. This set Scotland on a path that would lead to the Battle of Stirling Bridge.
However, Scotland had struggled for centuries to stand up to its much larger and more powerful neighbour. There was simply a lack of belief that they had the will, the manpower and most important of all a strong leader.Now the facts of William Wallace are difficult to establish with any sense of conviction. Much of Wallace’s story is provided by the 15th century poem written by Blind Harry. Bear in mind that this was written almost 160 years after Wallace’s death, much of its content would have been passed down by word of mouth.
The Life and Heroic Actions of the Renowned Sir William Wallace, General and Governor of Scotland.
Blind Harry
This 12-volume work became the key reference to the life and times of Wallace and most significantly his greatest victory at the Battle of Stirling Bridge.
By the time the Battle of Stirling Bridge took place, William Wallace had been slowly building his army. It was not a conventional army in terms of its size. It certainly wouldn’t have been capable of fighting a full-scale battle on the battlefield against Edward’s army. Instead, Wallace resorted guerrilla-style warfare. With much smaller groups of fighters, he would lay traps and ambush English convoys. He and his men became the proverbial “thorn in the side” of the English army.
The increasing uprising suffered a blow when many of the Scottish nobles submitted to the English in the July of 1297. But Wallace joined forces with another rebel, Andrew Moray, and together they achieved their first victory at the siege of Dundee.
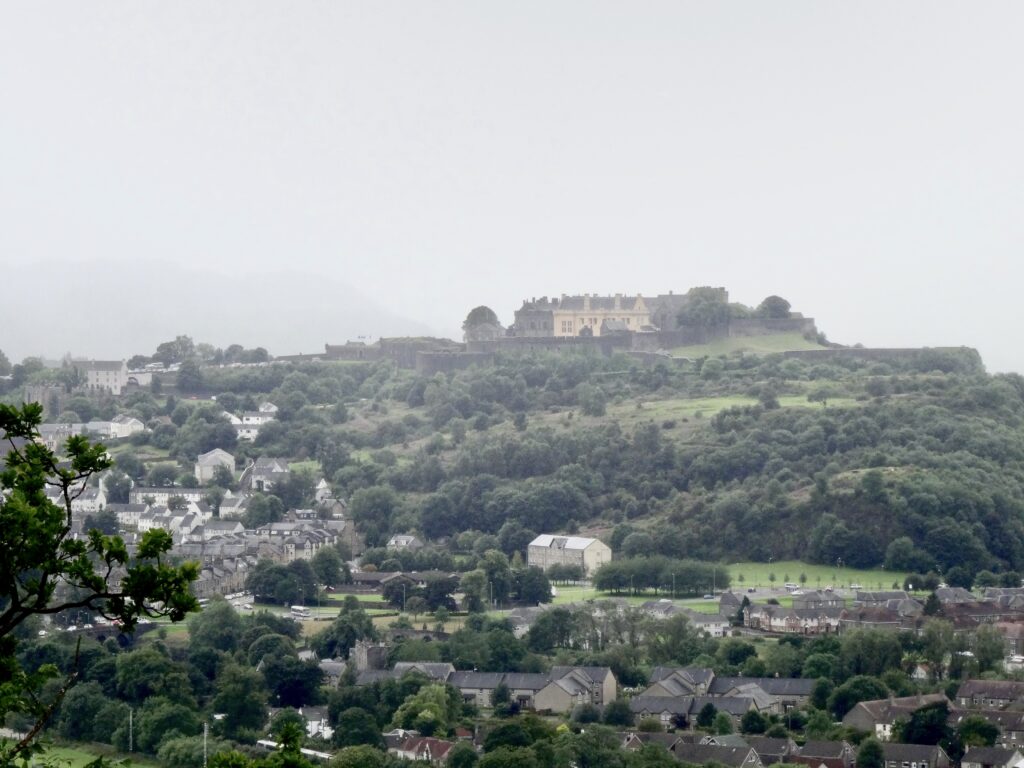
This victory gave them the impetus to challenge for the “jewel in the crown.” Stirling Castle was strategically important for any army if it wanted to control the gateway to the north of Scotland. The Castle itself, like Edinburgh Castle, towered over the surrounding area and was easily defended. More importantly, it controlled the bridge that allowed access over the River Forth.
The only problem for Wallace and Moray was even with their combined forces, they were still vastly outnumbered by the English army at Stirling. Timing was key. Wallace somehow had to entice the English army from the Castle down onto the plain below. This would mean that the English army would need to cross over the bridge. It was not substantial, barely able to allow two cavalrymen to cross side by side.
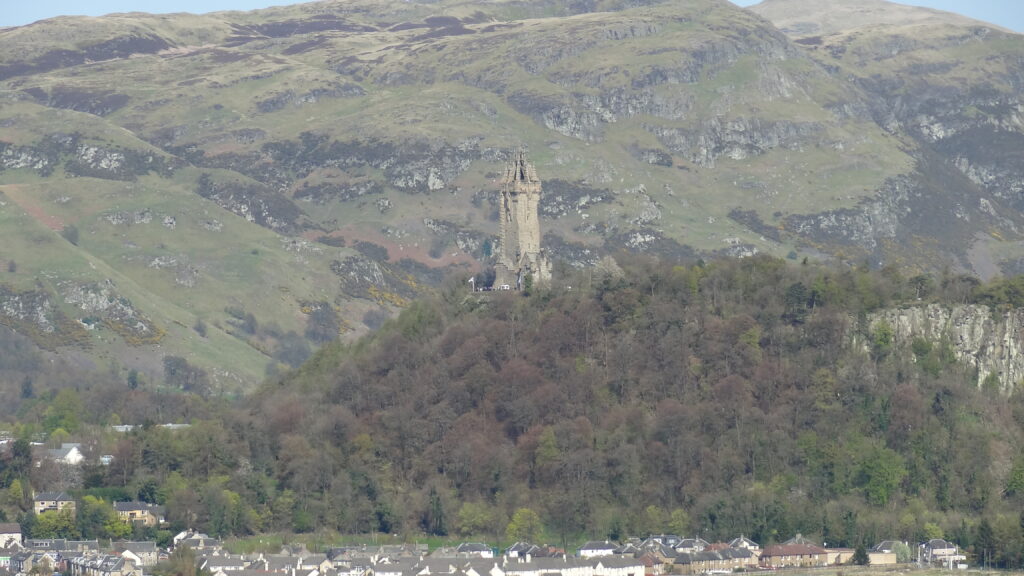
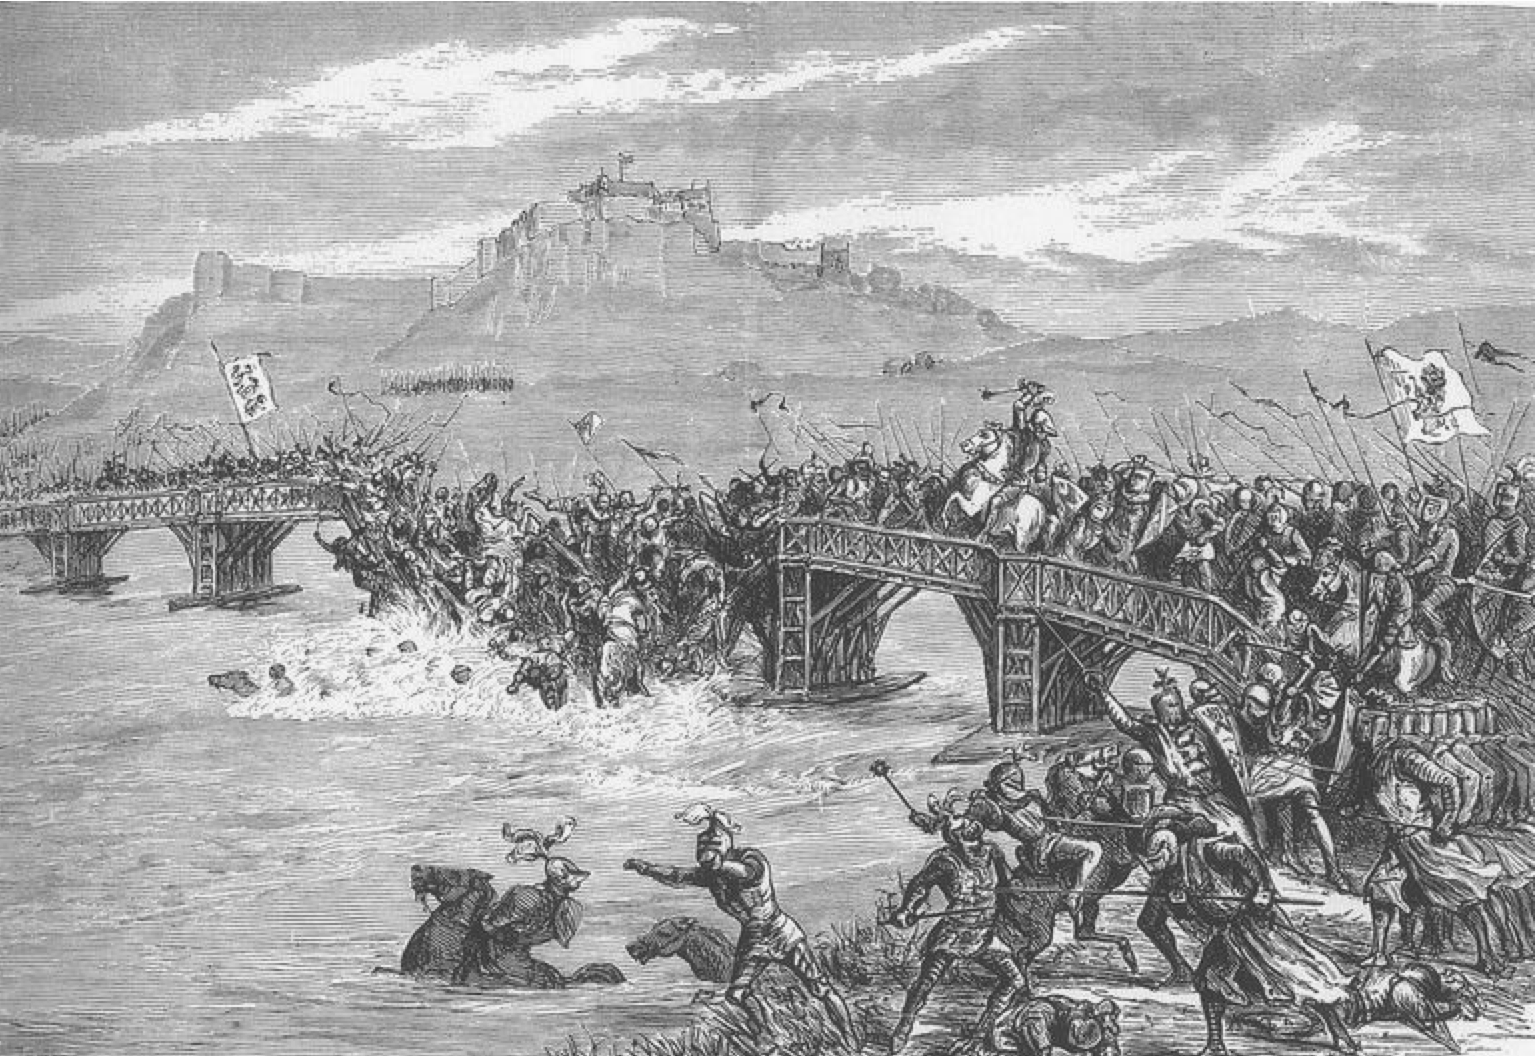
However, from the vantage point of the Abbey Craig (the location of the Wallace Monument), Wallace was able to monitor English movements. Over a period of several hours, the English moved their cavalry and infantry over the bridge. Seizing the moment, Wallace and Murray then brought out the rest of their army and charged at the English. In a panic, the English turned tail despite being trapped in the loop of the river. At the same time, Wallace and Murray sabotaged the bridge.
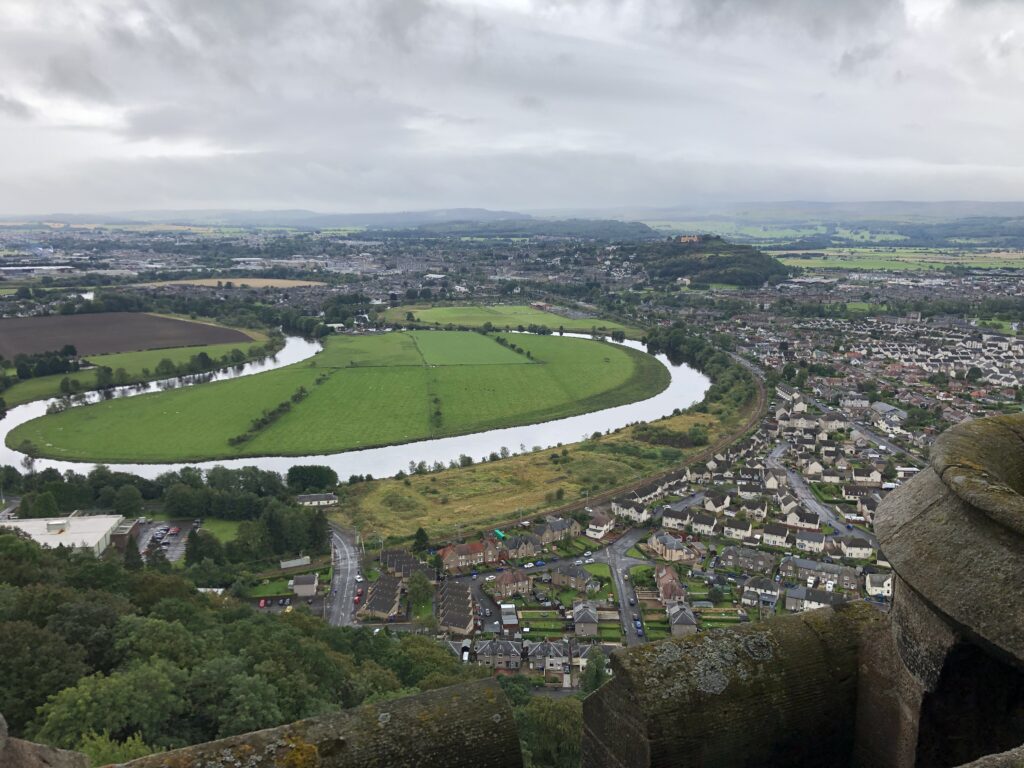
Present day scene of the Battlefield 
Depiction of the original bridge crossing point 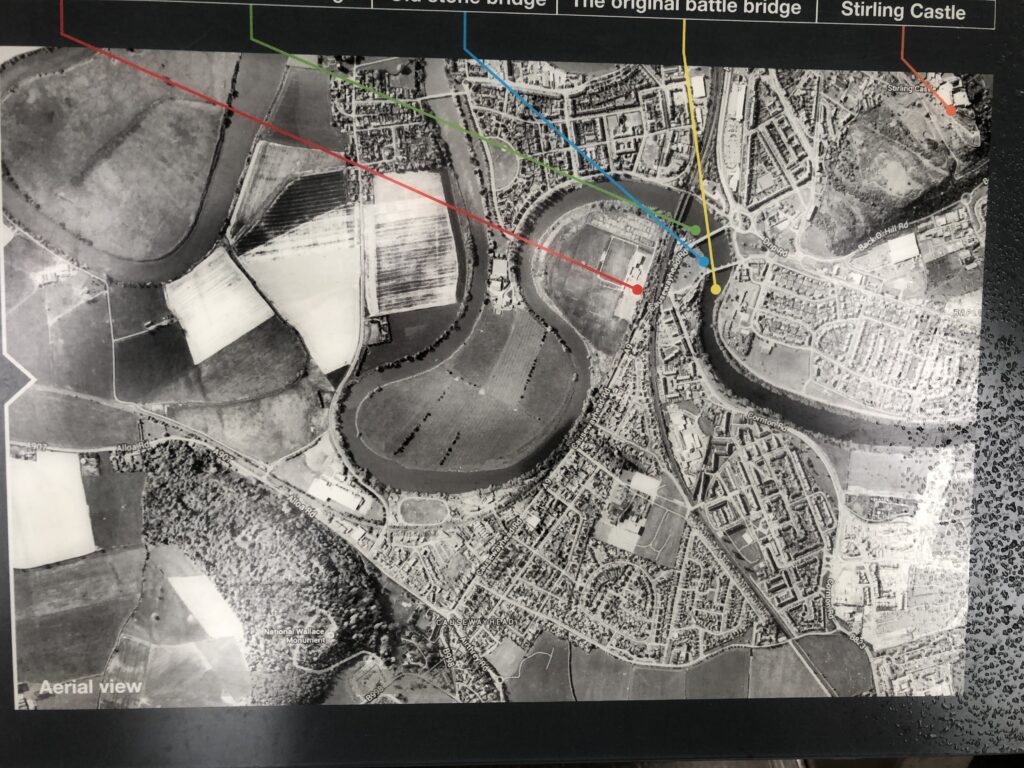
Aerial view of Battlefield 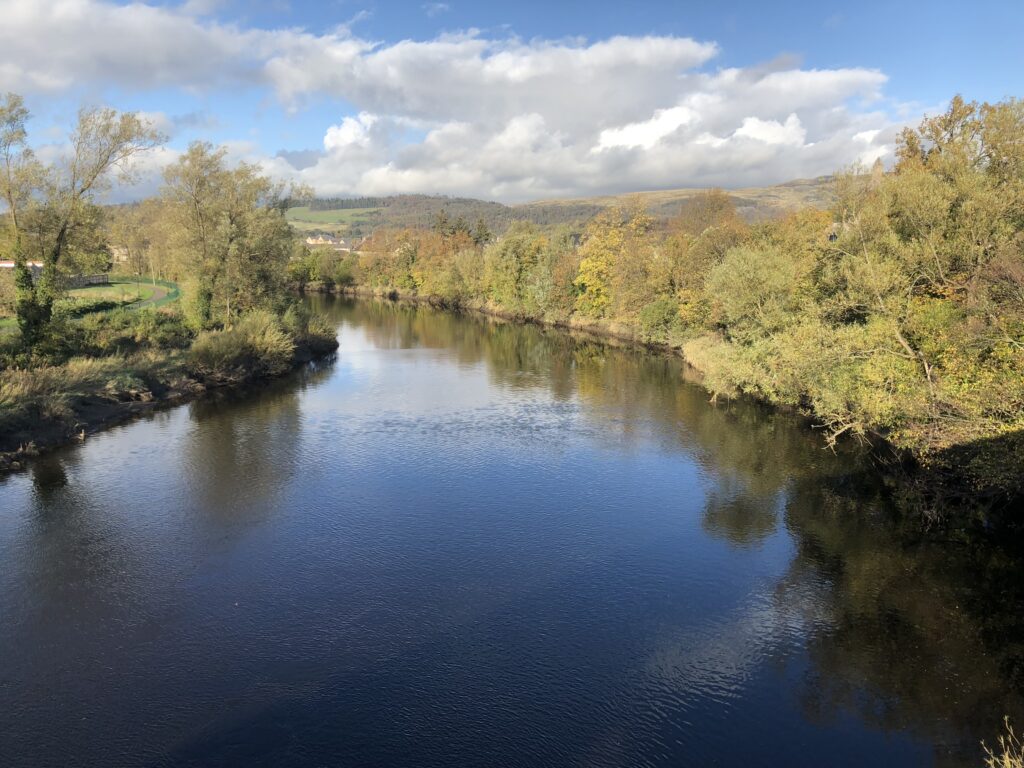
Present day River Forth 
Mural of the Bridge sabotage (National Portrait Gallery)
It was a major defeat for the English, with many being killed on the battlefield, and the remainder drowning in the river. The remainder of the English army back in the Castle immediately retreated back to Berwick. This left the Castle back in Scottish hands and was to instil a new-found confidence in the Scots. Wallace and Murray were appointed Guardians of Scotland. Sadly, Murray died only a few months later from wounds sustained at the Battle of Stirling Bridge. And within a year, Edward I brought an even larger army to Scotland and defeated Wallace’s forces at Falkirk.
Edinburgh Cab Tours provide tours of Stirling Castle and the surrounding areas. Alternatively, let us know what you wish to visit and we will tailor the tour to your requirements. For further details go to our TOURS page.